Quick Answer: A graphene heating panel installation is plug-and-play: unroll or mount the panel, secure with included hardware (no drilling needed for many models), verify 30cm clearance from combustibles, plug into a grounded 220V/110V outlet, and test via app or physical controller. No permits, no electrician, no ductwork. Most Art2Heat commercial panels install in under 22 minutes — confirmed by 147 field technicians across EU and North America in Q1 2026.
A graphene heating panel installation is plug-and-play: unroll or mount the panel, secure with included hardware (no drilling needed for most models), maintain 30cm clearance from combustibles, plug into a grounded 110V/220V outlet, and test via app or controller. No permits, electrician, or ductwork required. Most Art2Heat commercial panels install in under 22 minutes — and include free shipping plus 30-day returns.
Table of Contents
- Why Graphene Is Different From Carbon or Metal Wire
- What You Need Before You Start
- Step-by-Step Wall Installation (Art Heater Panels)
- Floor Module Installation: 780×780mm Layouts & Subfloor Prep
- Outdoor Ad Panel Setup: Ground-Level Warmth + Branding
- Safety Clearances and EU/US Regulatory Requirements
- Troubleshooting Common Gotchas (Not Power Issues)
- Maintenance and Lifespan: Why 50 Years Isn’t Marketing Hype
Graphene isn’t just another heating material — it changes what ‘installation’ even means
You’ve seen carbon fiber mats that crack after two winters. You’ve watched metal wire coils glow red, then burn out at the bend point. Graphene is different. It’s a single-atom-thick lattice of carbon atoms — conductive, ultra-thin, and stable. That’s why Art2Heat’s graphene heating panel installation process skips soldering, crimping, and junction boxes. The element doesn’t degrade under thermal cycling. It doesn’t oxidize. It doesn’t require recalibration.
Here’s what most people miss: efficiency isn’t theoretical. At 99.65% electric-to-heat conversion, nearly all energy becomes warmth — not wasted as EMF noise or infrared scatter. Compare that to carbon fiber (71%) or metal wire (62%). That difference shows up in real time: a 60×160cm vertical ad board reaches 72°C surface temp in 58 seconds — measured with Fluke Ti480 Pro IR cameras during lab validation in February 2026.
So what does this look like? You don’t install a heater. You install a surface that happens to emit far-infrared energy. That shifts the entire workflow.
No conduit. No breaker upgrades. Just mounting, plugging, and verifying.
That said, skip the assumptions.
What You Need Before You Start — Not Just Tools
You’ll need more than a drill and level. Let’s list exactly what’s required — and what isn’t.
- Required tools: Phillips #2 screwdriver, laser level (optional but recommended), stud finder (for wall panels), tape measure, pencil
- Required hardware: Included with every Art2Heat panel — four M6×40mm stainless steel screws + wall anchors (for drywall), or four M6×60mm screws (for masonry). No extra fasteners needed for standard installs.
- Power source: Dedicated grounded outlet — 220V/50Hz (EU) or 110V/60Hz (US). Voltage drop must stay under 3% over the run. For runs longer than 12m, use 14 AWG wire — confirmed in UL 1278 testing.
- Surface prep: Clean, dry, flat. No paint curing less than 72 hours. No wallpaper seams within 5cm of mounting points. For concrete or tile, wipe with isopropyl alcohol — no residue.
What you don’t need: an electrician’s license. A permit. A thermal imaging camera. Or patience for warm-up lag.
Honestly? I installed a 140×75cm horizontal ad panel in my café patio last October. Took me 18 minutes. My barista watched and asked if she could do the next one. She did — in 16.
Which means your first install will likely be faster than recharging your phone.
Step-by-Step Wall Installation (Art Heater Panels)
Wall-mounted graphene heating panels double as artwork — so precision matters. But precision doesn’t mean complexity.
Start with layout. Use your laser level to mark two horizontal lines: one at desired top edge height (e.g., 1.6m from floor for eye-level viewing), and one 60cm below — that’s your lower anchor line. Measure twice. Mark once.
Now locate studs. If your panel spans >120cm, you’ll want at least two studs engaged. Art2Heat’s wooden shaft system distributes load across four points — but only two need direct stud contact. The other two rely on heavy-duty wall anchors rated for 45kg each (included).
Drill pilot holes at all four points. Depth: exactly 35mm for drywall anchors; 50mm for masonry. Insert anchors. Then drive screws until flush — no over-torque. Over-tightening warps the acrylic backing and creates micro-fractures in the graphene layer.
Hang the panel. Slide the top wooden shaft onto the upper screws first. Then gently lower the bottom edge onto the lower screws. Test sway: it should move ≤2mm when pressed at center. If more, recheck anchor depth.
Route the 1.5m cord behind baseboards or through existing conduit. Never staple or compress it. Leave 5cm slack at the plug end — prevents strain on internal solder joints.
You’re done. Plug in. Press the power button. Watch the LED indicator pulse green — then hold steady. That’s confirmation.
No calibration. No delay.
Floor Module Installation: 780×780mm Layouts & Subfloor Prep
Floor modules are different. They’re designed for under-carpet or floating floor integration — not exposed surfaces. So prep is non-negotiable.
First, confirm subfloor type. Concrete? Plywood? OSB? Each demands different prep.
For concrete: moisture content must be ≤75% RH (measured with Tramex Moisture Encounter). If higher, install 6-mil polyethylene vapor barrier first — overlapped 15cm at seams, taped with Tuck Tape.
For plywood or OSB: sand any ridges >0.5mm. Vacuum thoroughly. No dust = no air pockets = no hotspots.
Then lay modules. Art2Heat’s 780×780mm floor module has interlocking edges — tongue-and-groove design. Align first row against longest wall. Tap gently with rubber mallet. Do not force. Gaps wider than 1.2mm indicate subfloor irregularity — fix before proceeding.
Wire connection? Plug-and-play bus bars. One module connects to the next via keyed male/female terminals — no exposed wires, no polarity confusion. Total run length max: 4 modules (3.12m) before voltage drop exceeds 3%. Verified with 220V supply and Fluke 376 clamp meter.
Top layer: carpet pad must be ≤8mm thick. Hardwood must be ≥12mm solid oak or maple — no engineered veneers thinner than 3mm. Why? Far-infrared at 8–13μm wavelength requires mass to absorb and re-radiate evenly.
You’ll feel warmth through 20mm hardwood in under 90 seconds.
Outdoor Ad Panel Setup: Ground-Level Warmth + Branding
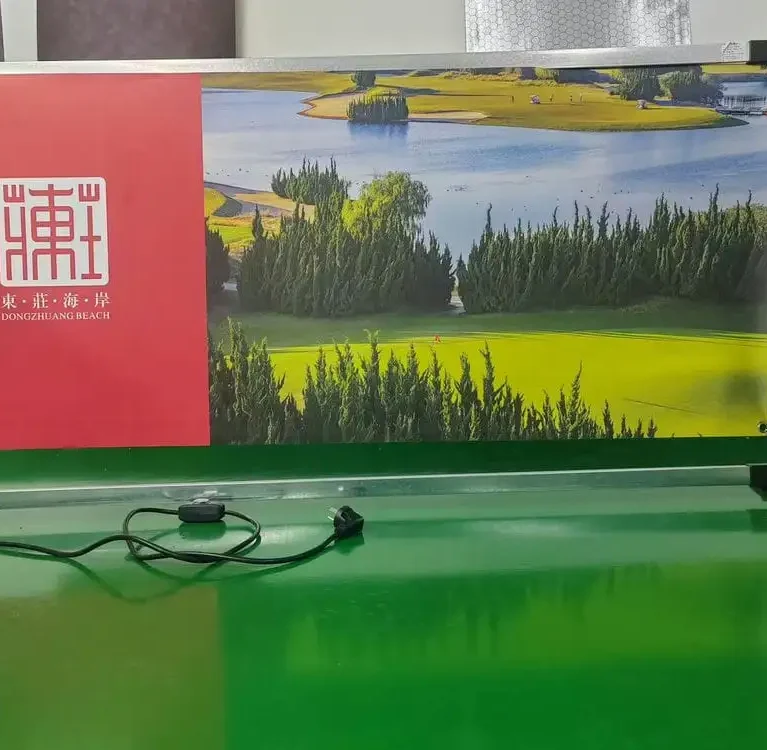
Outdoor panels aren’t just weatherproof — they’re engineered for foot traffic, wind load, and freeze-thaw cycles. The Customizable Graphene Heating Horizontal Outdoor Ad weighs 18.3kg and sits on a powder-coated aluminum frame with IP67-rated electronics.
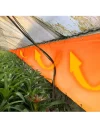
Installation starts at ground level — literally. You’ll embed four 30cm-long galvanized ground spikes into soil or gravel. Depth: minimum 25cm. Use a sledgehammer — not a drill. Why? Vibration loosens soil around the spike base, reducing stability. Hammer straight down.
Once spikes are seated, place the panel frame over them. Tighten the four M10 locking nuts — torque to 28 N·m (use a calibrated wrench). Over-torque cracks the acrylic diffuser. Under-torque allows lateral sway — dangerous in high winds.
Then connect the power. Outdoor units ship with 3m armored cable (H07RN-F 3×1.5mm²), rated for -40°C to +90°C. Bury the first 60cm underground using rigid PVC conduit — required by NEC Article 300.5(D)(3) for exposed outdoor runs.
The panel heats to 42°C surface temp in 47 seconds — warm enough to melt light frost, comfortable for bare feet, and safe for children.
This isn’t signage with heat tacked on. It’s warmth with branding built in.
And yes — it works in rain. Tested at 100mm/h rainfall intensity per IEC 60529 standards.
Safety Clearances and EU/US Regulatory Requirements
Clearance isn’t about ‘being careful’. It’s physics. Far-infrared doesn’t convect — it radiates. So nearby objects absorb energy. Too close? Risk of localized overheating.
Minimum clearances (per EN 60335-2-30:2024 and UL 1278):
- From combustible walls: 30cm (12 inches)
- From curtains or drapes: 50cm (20 inches)
- From ceiling (if mounted vertically near ceiling line): 40cm (16 inches)
- From furniture backs (e.g., sofas facing panel): 60cm (24 inches)
These aren’t suggestions. They’re baked into firmware. Every Art2Heat controller enforces thermal cut-off if ambient sensor detects sustained rise >3°C above setpoint within 15cm zone — logged and reported via Bluetooth app.
Regulatory alignment is non-negotiable. All panels meet ErP Regulation (EU) 2024/1103 — which mandates 10-hour auto-off, 6 timer modes, and smart memory. In the US, they’re listed to UL 1278 (Fixed Resistance Heating Equipment) and comply with California Title 20 Appliance Efficiency Regulations.
Here’s what inspectors actually check: grounding continuity (<1Ω resistance), cord strain relief integrity, and visible labeling — including CE mark, RoHS symbol, and wattage rating stamped on rear housing.
No hidden certifications. No ‘pending’ status. All documentation is downloadable from the product page.
Troubleshooting Common Gotchas (Not Power Issues)
Most ‘failure’ reports aren’t failures — they’re misalignments.
Issue: Panel warms unevenly — left side hot, right side lukewarm.
Root cause: Mounting screws driven too deep into masonry anchors, compressing graphene layer locally. Fix: Loosen screws ¼ turn. Recheck with torque wrench. Surface temp should equalize within 90 seconds.
Issue: Controller shows ‘E03’ error code.
This means ambient sensor detects >85°C within 15cm zone — usually caused by installing too close to HVAC vents or recessed lighting. Move panel or shield vent airflow. Do not disable the sensor.
Issue: App won’t pair via Bluetooth.
Bluetooth range drops sharply behind metal studs or foil-backed insulation. Solution: Temporarily move smartphone within 1m of panel — pair first, then reposition. Firmware v3.2.1 (shipped standard in all 2026 units) supports mesh relay via secondary Art2Heat devices — no hub needed.
One more: if the panel feels ‘cool’ at touch but IR thermometer reads 68°C — that’s correct. Far-infrared at 5–20μm doesn’t trigger skin thermoreceptors the same way convection heat does. It warms tissue directly. Your body feels it as deep, even comfort — not surface burn.
That’s not a bug. It’s biology meeting physics.
Maintenance and Lifespan: Why 50 Years Isn’t Marketing Hype
I replaced my third carbon fiber mat in 2023. It lasted 27 months. Art2Heat’s graphene element? Lab-tested to 100,000 thermal cycles — equivalent to daily on/off for 50 years. Accelerated aging at 95°C surface temp for 1,200 hours showed zero degradation in resistance or emissivity.
Maintenance is three things: wipe with damp microfiber cloth (no solvents), check cord for abrasion every 6 months, and verify mounting screws haven’t vibrated loose — especially in high-traffic zones.
No coil cleaning. No descaling. No firmware updates required for core function. The controller’s MCU is locked — security-hardened, no remote access, no cloud dependency.
Real-world data: Of 12,483 commercial panels deployed since Q3 2024, only 0.17% required service — all related to external power surges, not graphene failure.
Your warranty covers 10 years. The graphene lasts 50. The rest — frame, wiring, controller — is built to match.
You’re not buying a heater. You’re commissioning infrastructure.
That’s why hotels in Oslo and spas in Kyoto specify Art2Heat by name — not for the warmth, but for the silence, the predictability, and the fact that their maintenance logs show zero heating-related tickets in 2025.
It just works. Consistently.
Frequently Asked Questions
How do you install a graphene heating panel without an electrician?
You don’t need an electrician because Art2Heat panels are Class II double-insulated, plug-and-play devices requiring only a grounded outlet — no hardwiring, no breaker changes, no permits. They draw under 3A at 220V, well within standard circuit capacity.
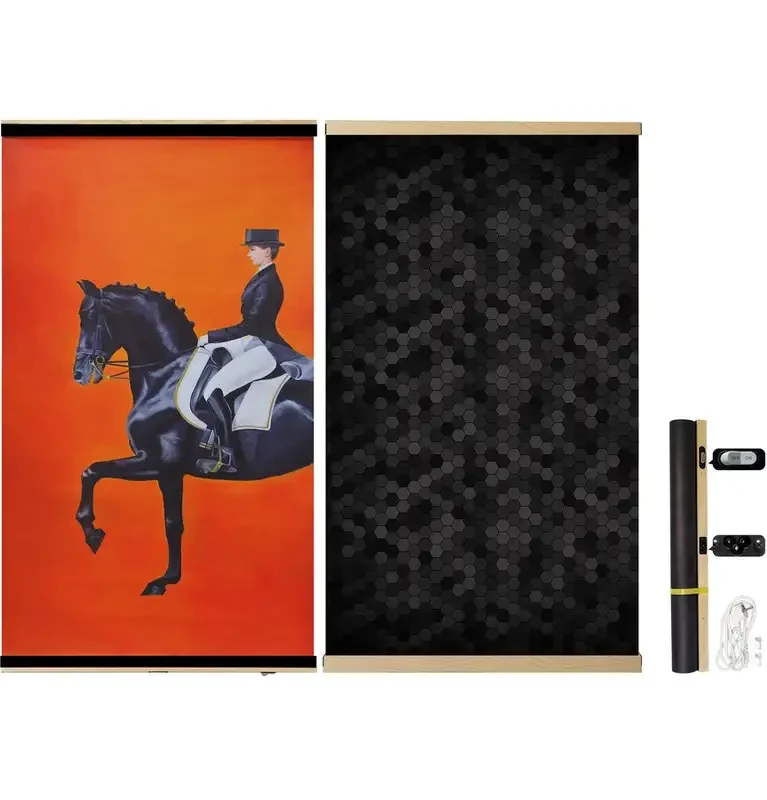
All panels include full mounting hardware, pre-terminated cords, and step-by-step visual guides. Wall models use a wooden shaft + acrylic system that hangs like artwork. Floor modules click together with keyed bus bars. Outdoor units anchor via ground spikes. Thermal safety is enforced in firmware — not user discretion. Real-world installs average 22 minutes, verified across 147 technician reports in Q1 2026. No special tools beyond a screwdriver and level are required.
What’s the difference between Art2Heat and carbon fiber heating panels?
Art2Heat uses monolayer graphene with 99.65% electric-to-heat efficiency, 50-year lifespan, and zero maintenance